Как автоматически вставить пустую новую строку с помощью кнопки Command в Excel?
Во многих случаях вам может понадобиться вставить пустую новую строку в определенное место вашего листа. В этой статье мы покажем, как автоматически вставить пустую новую строку, нажав на кнопку Command в Excel.
Автоматическая вставка пустой новой строки с помощью кнопки Command
Автоматическая вставка пустой новой строки с помощью кнопки Command
Вы можете запустить следующий код VBA для вставки пустой новой строки, нажав на кнопку Command. Пожалуйста, выполните следующие действия.
1. Сначала вам нужно вставить кнопку Command. Пожалуйста, нажмите Разработчик > Вставить > Кнопка Command (Элемент управления ActiveX). Смотрите скриншот:

2. Затем нарисуйте кнопку Command на листе, куда вы хотите добавить новые строки, щелкните правой кнопкой мыши по кнопке Command и выберите Свойства из контекстного меню.

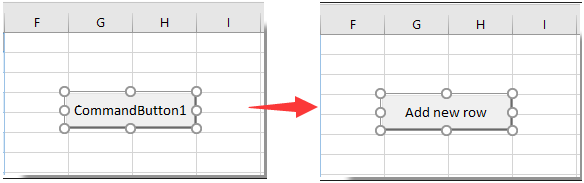
3. В диалоговом окне Свойства введите отображаемый текст кнопки Command в поле Подпись под вкладкой Категоризировано, а затем закройте диалоговое окно.

Вы можете увидеть, что отображаемый текст кнопки Command изменен, как показано на скриншоте ниже.
4. Щелкните правой кнопкой мыши по кнопке Command снова, а затем выберите Просмотр кода из контекстного меню.

5. Затем в окне Microsoft Visual Basic for Applications замените исходный код следующим кодом VBA в окне Код.
Код VBA: Автоматическая вставка пустой новой строки с помощью кнопки Command
Private Sub CommandButton1_Click()
    Dim rowNum As Integer
    On Error Resume Next
    rowNum = Application.InputBox(Prompt:="Enter Row Number where you want to add a row:", _
                                    Title:="Kutools for excel", Type:=1)
    Rows(rowNum & ":" & rowNum).Insert Shift:=xlDown
End SubПримечание: В коде CommanButton1 — это имя созданной вами кнопки Command.
6. Нажмите клавиши Alt + Q одновременно, чтобы закрыть окно Microsoft Visual Basic for Applications. И выключите Режим конструктора на вкладке Разработчик.
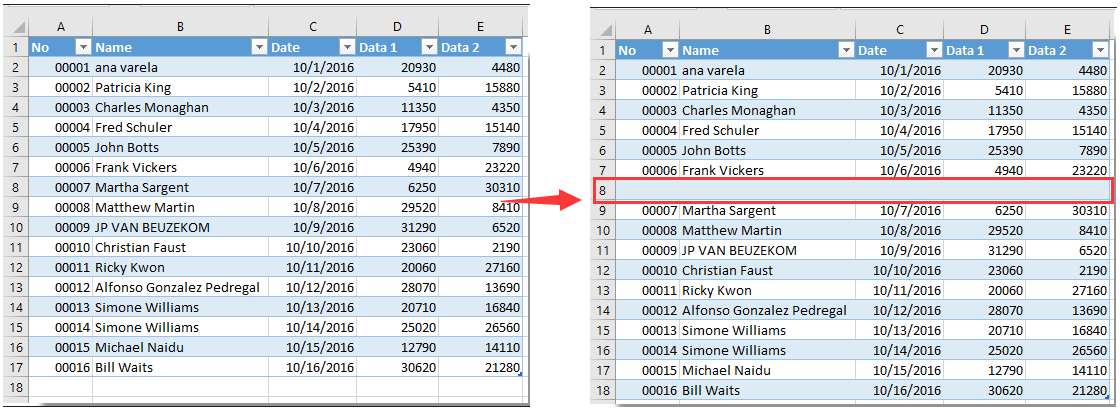
7. Нажмите на вставленную кнопку Command, и появится диалоговое окно Kutools для Excel. Пожалуйста, введите номер строки, куда вы хотите добавить пустую новую строку, а затем нажмите кнопку ОК. Смотрите скриншот:

Затем пустая новая строка вставляется в указанное место вашего листа, как показано на скриншоте ниже. Она сохраняет форматирование ячеек из верхней ячейки.

Раскройте магию Excel с Kutools AI
- Умное выполнение: Выполняйте операции с ячейками, анализируйте данные и создавайте диаграммы — всё это посредством простых команд.
- Пользовательские формулы: Создавайте индивидуальные формулы для оптимизации ваших рабочих процессов.
- Кодирование VBA: Пишите и внедряйте код VBA без особых усилий.
- Интерпретация формул: Легко разбирайтесь в сложных формулах.
- Перевод текста: Преодолейте языковые барьеры в ваших таблицах.
Связанные статьи:
- Как использовать кнопку Command для сохранения активного листа в виде PDF-файла в Excel?
- Как отформатировать ячейку, чтобы она выглядела как 3D-кнопка в Excel?
- Как скрыть или показать кнопку Command на основе определенного значения ячейки в Excel?
Лучшие инструменты для повышения продуктивности в Office
Повысьте свои навыки работы в Excel с помощью Kutools для Excel и ощутите эффективность на новом уровне. Kutools для Excel предлагает более300 расширенных функций для повышения производительности и экономии времени. Нажмите здесь, чтобы выбрать функцию, которая вам нужнее всего...
Office Tab добавляет вкладки в Office и делает вашу работу намного проще
- Включите режим вкладок для редактирования и чтения в Word, Excel, PowerPoint, Publisher, Access, Visio и Project.
- Открывайте и создавайте несколько документов во вкладках одного окна вместо новых отдельных окон.
- Увеличьте свою продуктивность на50% и уменьшите количество щелчков мышью на сотни ежедневно!
Все надстройки Kutools. Один установщик
Пакет Kutools for Office включает надстройки для Excel, Word, Outlook и PowerPoint, а также Office Tab Pro — идеально для команд, работающих в разных приложениях Office.
- Комплексный набор — надстройки для Excel, Word, Outlook и PowerPoint плюс Office Tab Pro
- Один установщик, одна лицензия — настройка занимает считанные минуты (MSI-совместимо)
- Совместная работа — максимальная эффективность между приложениями Office
- 30-дневная полнофункциональная пробная версия — без регистрации и кредитной карты
- Лучшее соотношение цены и качества — экономия по сравнению с покупкой отдельных надстроек